Sony Ericsson has released Android 4.0.1 Ice Cream Sandwich ROM for Xperia Arc, Xperia Neo V & Xperia Ray android phones. This is very early build of ICS and is strictly for those who understand the consequences of running Alpha rom. Also the ROM offers very limited features infect basic calling functionality doesn’t work on this ROM.
In order to install Ice Cream Sandwich ROM you must unlock your phone using boot loader unlock service provided by Sony Ericsson (by doing this you will void your warranty, you are warned).
The number of features and functionality working or turned on in this alpha ROM are very limited. This is because many features are not yet certified, below is short list of features which are turned on/off in this ROM,
1. Google Mobile Services (GMS) apps are not included (for example, Gmail, Google Maps, etc.).
2. Modem is turned off and SIM card will therefore not be recognised (this also means you can’t make any phone calls).
3. Bluetooth™ is turned off.
4. Wi-Fi® is turned off.
5. ANT+ is turned off.
6. FM-radio is turned off.
The original Xperia arc is not due to be updated until late May 2012. Fear not though as given the similarities between the Xperia arc and Xperia arc S, arc users can install the ICS update to their handset right now. The guide below takes you through what you need to do step-by-step.
Installing the official Android 4.0 ICS update to your Xperia arc
Disclaimer: You should note that once you complete the process, your phone will be recognised as the Xperia arc S (LT18i). Android 4.0 ICS will work as advertised, but you may encounter certain bugs or issues as the firmware was not designed specifically for the Xperia arc. Xperia Blog absolves itself from any responsibility should something go wrong. Please proceed with caution and at your own risk.
Note: This tutorial does not require you to root your handset and it does not require you to unlock your bootloader.
1) Install drivers for the Xperia arc
The very first step is to make sure that your PC has all of the necessary drivers installed for the Sony Xperia arc. The best way to do this is to install PC Companion or Sony Ericsson Update Service (SEUS). Make sure you connect the Xperia arc to the PC before starting the process to download the necessary USB and ADB drivers. If you have any problems you will find the necessary drivers once you have installed Flashtool in the following location: ‘C:\Flashtool\drivers’.
2) Switch on USB debugging on your handset
Switch on the debugging option on your Xperia arc. Go to Menu –> Settings –> Applications –> Development –> Tick ‘USB debugging’
Also tick ‘Unknown sources’ under Menu –> Settings –> Applications
3) Install Flashtool 0.7.0.0
You must ensure you install Flashtool version 0.7.0.0 for this process to work. The older versions of Flashtool do not have the command to handle the new ICS partition resizes.
As the official Flashtool site is currently not allowing a download of the necessary file, you can download it from our mirror here. The zip package includes two files: 1) Flashtool 0.6.9.1 and 2) an update zip file.
a. Install the ‘flashtool-0.6.9.1-windows’ application.
b. Once complete, unzip the ‘update’ file. Move and replace all contents of the zip file to C:\Flashtool.
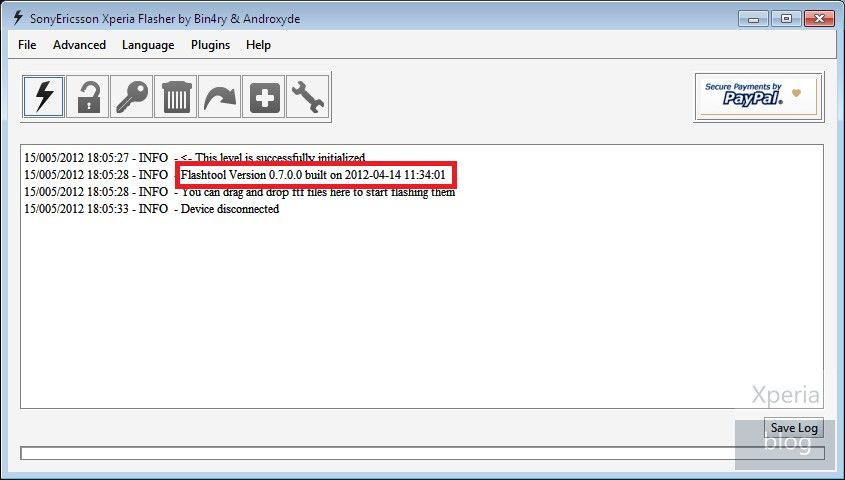
c. Once you have done this, launch Flashtool. The log window should show that you are using ‘Flashtool Version 0.7.0.0 built on 2012-04-14 11:34:01′. To make sure of this you can always go into Help > About to see what version you are using.

4) Download the Generic Nordic ICS Xperia arc S firmware
Download the Generic Nordic ICS Xperia arc S firmware from here (377MB). This is firmware version 4.1.A.0.562 which will update your phone to Android 4.0.3.
A note of warning: Some browsers like Opera will rename the extension of this FTF file as a zip file when trying to download it. Make sure that the downloaded file has a .ftf extension rather than .zip.
5) Place firmware in correct location on your PC
Place the FTF file in the C:\Flashtool\firmwares folder.
6) Launch Flashtool
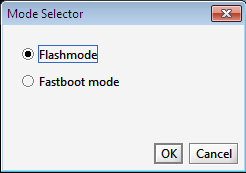
Open the Flashtool application on your PC. Click on the lightning bolt symbol. Select Flashmode and click OK.

7) Select firmware
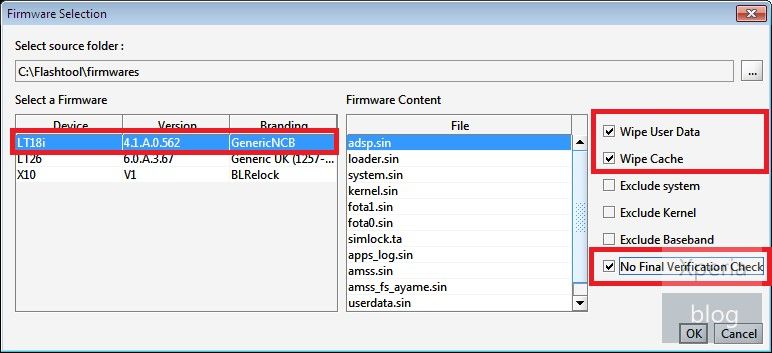
Select the correct firmware in the left column (LT18_4.1.A.0.562_NCB). Check the boxes as seen in the picture below (‘Wipe User Data’, ‘Wipe Cache’ and ‘No Final Verification Check’ all need to be ticked).

8 ) Connect Xperia arc to PC
Turn your phone off. Press and hold the back key while plugging the USB cable into your Xperia arc.
9) Flashing process will start
The flashing process should now start. Once you see the “Flashing finished” message in Flashtool, remove your handset from the PC and wait until the phone reboots (this may take some time so don’t panic).
10) Your Xperia arc should now be running ICS
Congratulations, your Sony Xperia arc should now be running Android 4.0 Ice Cream Sandwich!


.jpg)


.jpg)
.jpg)


No comments:
Post a Comment